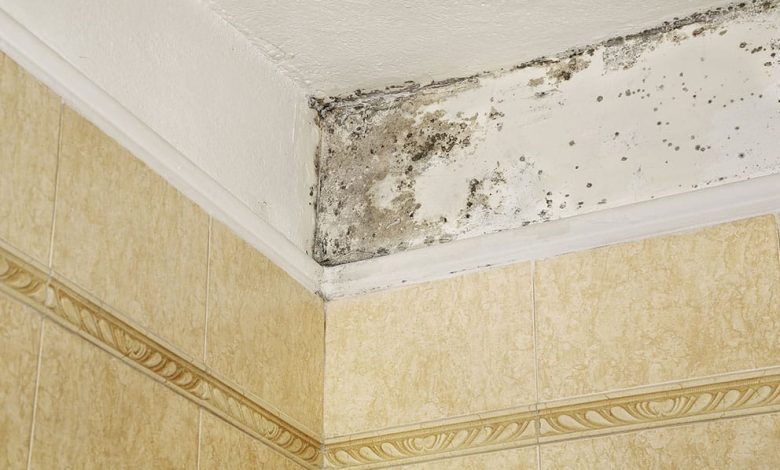
Moisture in bathroom walls is a common problem that can lead to mold, peeling paint, and structural damage. Bathrooms are naturally humid environments, and without proper ventilation and waterproofing, moisture can seep into walls, causing long-term issues. Fortunately, there are practical solutions to prevent and manage moisture, protecting both your walls and your health.
Here’s a comprehensive guide on how to stop moisture in bathroom walls and maintain a dry, safe, and comfortable space.
Identify the Source of Moisture
Before fixing the problem, it’s crucial to understand where the moisture is coming from. Common causes include:
- Poor ventilation: Bathrooms without proper airflow trap humidity.
- Leaky pipes or plumbing: Cracks, loose connections, or damaged seals can allow water into walls.
- Faulty grout or caulking: Gaps around showers, tubs, or sinks let water penetrate surfaces.
- Condensation: Warm, humid air contacting cold walls causes water to form.
Identifying the source ensures you address the root cause rather than just treating symptoms.
Improve Ventilation
Proper ventilation is key to reducing moisture buildup. Bathrooms should have an exhaust fan that vents outside the house.
- Install or upgrade an exhaust fan: Make sure it is appropriately sized for your bathroom.
- Use the fan consistently: Run it during showers and for at least 20–30 minutes afterward.
- Open windows when possible: Natural airflow complements mechanical ventilation and helps reduce humidity.
Better airflow prevents condensation and keeps walls dry.
Seal Leaks in Plumbing
Leaks in pipes, faucets, or shower fixtures allow water to seep into walls, causing long-term damage.
- Inspect plumbing: Look for drips, corrosion, or loose connections behind sinks, tubs, and showers.
- Repair or replace damaged pipes: Fixing leaks promptly prevents moisture from infiltrating walls.
- Check wall joints and behind tiles: Hidden leaks can lead to extensive water damage if left untreated.
Addressing plumbing issues early protects both walls and structural integrity.
Re-caulk and Re-grout
Old or cracked caulking and grout around sinks, tubs, and showers allow water to penetrate the walls.
- Remove old caulk and grout: Clean the area thoroughly to remove mold, mildew, and residue.
- Apply new silicone caulk: Use high-quality waterproof caulk designed for bathrooms.
- Re-grout tiles: Seal gaps to prevent water seepage and improve durability.
Maintaining tight seals ensures that water stays where it belongs—inside sinks and tubs, not in the walls.
Use Water-Resistant Paint
Moisture-resistant or waterproof paint provides an extra barrier against humidity and condensation.
- Choose bathroom-grade paint: These paints are formulated to resist mold and mildew.
- Apply multiple coats: A proper layer ensures better protection.
- Focus on high-moisture areas: Pay special attention to walls near showers, tubs, and sinks.
Water-resistant paint reduces the risk of water damage and keeps walls looking fresh longer.
Install a Vapor Barrier
For major renovations or persistent moisture problems, installing a vapor barrier behind walls prevents water from seeping into drywall.
- Use plastic sheeting or specialized vapor-resistant drywall: Place it between the wall studs and outer wall.
- Seal all seams properly: Ensure the barrier is continuous to be effective.
- Combine with proper ventilation: A vapor barrier works best when humidity is also controlled.
This solution is particularly effective for bathrooms prone to chronic dampness or condensation.
Manage Humidity
High humidity contributes to moisture problems. Controlling humidity reduces condensation on walls.
- Use a dehumidifier: Portable or wall-mounted units help maintain a comfortable humidity level.
- Keep doors open after showers: Allow air circulation to reduce trapped steam.
- Avoid overcrowding with fabrics: Towels, rugs, and curtains trap moisture, so ensure proper drying.
Consistent humidity management protects walls and prevents mold growth.
Regular Maintenance
Preventing moisture requires ongoing attention. Simple maintenance tasks make a big difference:
- Inspect walls for discoloration or peeling paint: Early signs of moisture should be addressed immediately.
- Clean grout and caulk regularly: Prevents mold buildup and maintains effective seals.
- Check exhaust fans and vents: Ensure they are clean and functioning properly.
Routine checks prevent minor problems from becoming major water damage issues.
Consider Professional Help
If moisture persists despite DIY efforts, it may indicate structural issues, hidden leaks, or extensive mold.
- Hire a licensed plumber: For hidden leaks or recurring water problems.
- Consult a contractor or waterproofing expert: For wall repairs, vapor barriers, or mold remediation.
- Address mold professionally: Mold can be hazardous, so professional removal ensures safety.
Professional assistance ensures that the problem is solved thoroughly and prevents further damage.
Final Thoughts
Moisture in bathroom walls is a common but manageable problem. By identifying the source, improving ventilation, sealing leaks, using water-resistant materials, and maintaining proper humidity, you can protect your walls and keep your bathroom safe and comfortable.
Regular maintenance, smart design choices, and occasional professional assistance help ensure that your bathroom remains dry, stylish, and free from damage. A well-maintained bathroom not only looks better but also adds to the overall health and value of your home.
Stay in touch to get more updates & news on Visit Blog!